Tag Archives: SpecFlow

Using step definition code from Given and When contexts

Have you ever wanted to use a single step definition like I create file '(.*)' from Given and When contexts in a feature file like this?

Scenario: CreateFile
    When I create file 'hello.txt'
    Then ...

Scenario DeleteFile
    Given I create  file 'hello.txt'
    When I delete 'hello.txt'

Here’s how to have 1 method that implements both the Given and the When I create file '...'

Create a class like this:

public class GivenWhenAttribute : StepDefinitionBaseAttribute
{
readonly static StepDefinitionType[] types = new[] { StepDefinitionType.Given, StepDefinitionType.When };
public GivenWhen() : this(null)  {  }
public GivenWhen(string regex) : base(regex, types ) { }
public GivenWhen(string regex, string culture) : this(regex) { Culture = culture; }
}

Use it in in the [Binding] classes like this:

[GivenWhen("I create file '(.*)'")]
public void CreateFile(String Name) { File.Create(Name); }

Automatic type conversion of parameters in SpecFlow

In a previous post I showed that SpecFlow can change values of parameters. This mechanism is not just limited to transforming content of string values. It can also convert the literal string in your feature file to some complex object for your step-definition code.

Let say in your feature file you want to write steps like this:

Scenario: MyScenario
    When I print this list 'A,B,C,D'

Then you might be tempted to convert the string 'A,B,C,D' to a list like this

[Binding]
public class MyBindings
{
    [StepDefinition(@"I print this list '([^']*)'") ]
    public void PrintList(string input)
    {
        var items = input.Split(',')
        foreach(var item in items)
        {
            Console.WriteLine(item)
        }
    }
}

Don’t do this…it causes the same problems as mentioned in the previous post.

Instead SpecFlow’s Step Argument Conversion lets us simplify our step definition code to this:

[Binding]
public class MyBindings
{
    [StepDefinition(@"I print this list '([^']*)'") ]
    public void PrintList(IEnumerable<string> items) 
    {
        foreach(var item in items)
        {
            Console.WriteLine(item)
        }
    }
   
    [StepArgumentTransformation]
    public IEnumerable<string> TransformStringToList(string input)
    {
        return input.Split(',');
    }
}

Automatic parsing of parameters in SpecFlow

Most implementations of cucumber can automatically replace parameter values with some run time value. Let say in your feature file you want to write steps like this:

Scenario: MyScenario
    When I print 'Hello from test case {test}' 
    When I save the value '{test}' to my database

Then you might be tempted to write these bindings (dont do this…keep reading!)

[Binding]
public class MyBindings
{
    [StepDefinition(@"I print '([^']*)'") ]
    public void PrintMessage(string Message)
    {
        string Name = ....
        Message = Message.Replace("{test}",Name)
        Console.WriteLine(Message);
    }

    [StepDefinition(@"I save '([^']*)' to my database") ]
    public void SaveToDatabase(string Message)
    {
        string Name = ....
        Message = Message.Replace("{test}",Name)
        Console.WriteLine(Message);
    }
}

This way of writing step definitions becomes a real problem as the size of your automation increases:

  1. we have to repeat the same logic in every step definition.
  2. Its easy to forget to repeat that code.
  3. New placeholders need you to find and update all places where this kind of parsing is done.
  4. Its code that’s needed but not relevant for the objective of the step definitions.

Luckily SpecFlow’s Step Argument Conversion helps us! We can simplify our binding code to this:

[Binding]
public class MyBindings
{
    [StepDefinition(@"I print '([^']*)'") ]
    public void PrintMessage(string Message) => Console.WriteLine(Message);

    [StepDefinition(@"I save '([^']*)' to my database") ]
    public void SaveToDatabase(string Message) => Console.WriteLine(Message);
    
    [StepArgumentTransformation]
    public string TransformParsedString(string input)
    {
        string Name = ...
        return input.Replace("{test}",Name);
    }
}

Other implementations of cucumber also implement this principle. Its frequently referred to using these buzzwords:

  1. Transforms / Transformations
  2. Parsing / Replacing
  3. StepArgumentTransformation

Running your testcases concurrently

System- and integration tests can take a lot of time to complete. If you want to speed this up then you can choose to run multiple test cases at the same time in parallel.

Unit Testcases in Visual Studio


You can configure Visual Studio to run unit concurrent testcases on your local machine using the following procedure:

  1. Ensure your project is using a .testsettings file
  2. Open it in an XML editor (Notepad++ or visual Studio’s “Open With” command)
  3. Set the parallelTestCount attribute on the Execution entity some some integer value

This will only work for situations where all the following is true:

  • The testcases and related frameworks are thread-safe
  • The testcases are of type unit testcase. It really won’t work for coded-ui tests
  • Its NOT a Data-Driven Unit Test
  • There are 0 diagnostic adapters included in the .testsettings file
  • Your machine has multiple cores

Controller and Agents with Visual Studio


If you have enough Physical or Virtual Machines available, then its always possible to configure a Controller and multiple agents. That will allow you to distribute your testcases over the machines. There’s no limitation on the type of testcases here. The only thing to take into account that running testcases that interact with a User Interface will require specific configuration on part of the agent machines. I use this setup mainly for running a lot of performance-tests against my client’s SharePoint farm.

See Configuring Test Controllers and Test Agents for Load Testing for details.

SpecFlow / SpecRun


SpecRun is a test-runner from the makers of SpecFlow that will allow you to run many concurrent SpecFlow scenarios. Its easy to setup and doesn’t really have any significant limitations. I use a combination of SpecFlow, SpecRun and an on-premise Selenium Grid to run my 250+ automated regression tests.

What to do when SpecRun doesn’t find any testcases to execute

So you’ve installed SpecRun, updated app.config, started a testrun….but SpecRun reports that it found 0 testcases. There’s two fixes for this.

Regenerate the feature files


Usually the *.feature.cs code-behinds aren’t removed when you clean the project. Those files still contain code pertaining to the previous test runner. You need to regenerate the .feature files in the solution before the code-behinds are updated to use the SpecRun test runner.

Clean Visual Studio’s cache for the test runners


Another cause for this unexpected behavior is due due to corruption in Visual Studio’s cache for the test runners. This can be fixed by the following:

  1. Close Visual Studio
  2. navigate to %TEMP%\VisualStudioTestExplorerExtensions\
  3. Delete any SpecRun related folders

Describing large forms and data entry in Cucumber / SpecFlow feature files

Did you know that in .feature files you can use the table notation to specify each field and value in rows instead of columns?

This can make the file way more readable when a step needs a lot of different parameters. Here is an example that shows both ways of creating an invoice:

Feature: Demo

Scenario: TwoDifferentStylesOfSteps
	When I create an invoice with number '111' with '119.00' euro total, '19.00' euro VAT from 'ACME Inc' at '1234XYZ 99' in 'USA'
	When I create the following invoice:
		| Field            | Value      |
		| Number           | 222        |
		| TotalAmount      | 238.00     |
		| VATAmount        | 38.00      |
		| Debtor           | ACME Inc   |
		| DebtorAdresLine1 | 1234XYZ 99 |
		| DebtorCountry    | USA        |
	Then The systems invoice store must look like this:
		| Number | TotalAmount | VatAmount |
		| 111    | 119.00      | 19.00     |
		| 222    | 238.00      | 38.00     |
		

Here is the corresponding binding code:

namespace TableExample
{
    public class Invoice
    {
        public int Number { get; set; }
        public decimal TotalAmount { get; set; }
        public decimal VatAmount { get; set; }
        public string Debtor { get; set; }
        public string DebtorAdresLine1 { get; set; }
        public string DebtorAdresLine2 { get; set; }
        public string DebtorCountry { get; set; }
    }
  
    [Binding]
    public class TablesSteps
    {
        private IList<Invoice> Invoices;

        public TablesSteps()
        {
            this.Invoices = new List<Invoice>();
        }


        [When(@"I create an invoice with number '(.*)' with '(.*)' euro total, '(.*)' euro VAT from '(.*)' at '(.*)' in '(.*)'")]
        public void WhenICreateAnInvoiceWithNumberWithEuroTotalEuroVATFromAtIn(int Number, 
            decimal TotalAmount,
            decimal VatAmount,
            string Debtor,
            string DebtorLine1,
            string DebtorCountry)
        {
            Invoice TestInvoice = new Invoice();
            TestInvoice.Number = Number;
            TestInvoice.TotalAmount = TotalAmount;
            TestInvoice.VatAmount = VatAmount;
            TestInvoice.Debtor = Debtor;
            TestInvoice.DebtorAdresLine1 = DebtorLine1;
            TestInvoice.DebtorCountry = DebtorCountry;
            this.Invoices.Add(TestInvoice);
        }

        [When(@"I create the following invoice:")]
        public void WhenICreateTheFollowingInvoice(Table table)
        {
            Invoice TestInvoice = table.CreateInstance<Invoice>();
            this.Invoices.Add(TestInvoice);
        }

        [Then(@"The systems invoice store must look like this:")]
        public void ThenTheSystemsInvoiceStoreMustLookLike(Table table)
        {
            var rows = table.CreateSet<Invoice>();
            foreach (Invoice test in rows)
            {
                IEnumerable<Invoice> Matches = this.Invoices
                    .Where(invoice => invoice.Number.Equals(test.Number))
                    .Where(invoice => invoice.TotalAmount.Equals(test.TotalAmount))
                    .Where(invoice => invoice.VatAmount.Equals(test.VatAmount));
                Assert.AreEqual(1, Matches.Count(), string.Format("Invoice {0} not correct in invoicestore", test.Number));
            }
        }

    }

}

Combining SpecFlow and Selenium

One of the cool things I like to do when testing webapps, is to define the testcases using SpecFlow (also known as Cucumber) and then use Selenium to actually execute the testcases against the web-application.

Here is an example testcase:

Feature: SpecFlowAndSelenium
	For demonstration purposes, I want to show how the human-readable
	SpecFlow testcases can be executed using Selenium to operate
	a real webbrowser

Scenario: SeleniumAndSpecFlow
	Given I navigate to 'http://www.google.com'
	Then there must be a control with 'id' 'gbqfq' 
	When I type 'Hello World!' into it
	Then there must be a control with 'id' 'gbqfb'
	When I click on it
	Then there must be a link with 'partialtext' 'Wikipedia' 
	When I click on it
	Then there must be a control with 'id' 'searchInput'
	When I type 'Selenium' into it
	Then there must be a control with 'id' 'searchButton' 
	When I click on it
	Then there must be a link with 'text' 'chemical element'
	And there must be a link with 'text' 'Selenium (software)'
	When I click on it
	Then there must be a link with 'text' 'web browsers'

And here you can see Selenium using Firefox to perform all the actions and checks:

Automatic conversion of Tables to your C# classes using Specflow.Assist.Dynamic

Using tables in .feature files is good practice for creating readable and maintainable testcases. When you create the step definitions, you’ll frequently find yourself creating code to convert the fields in the Table class to something more useful for your code. Using Specflow.Assist.Dynamic we can have automatic conversion between the Table class and a collection of our own classes. In this post we’ll see how to get this working for a basic example

Install the NuGet package

PM> Install-Package Specflow.Assist.Dynamic
Attempting to resolve dependency 'ImpromptuInterface (≥ 5.6.2)'.
Attempting to resolve dependency 'SpecFlow'.
Installing 'ImpromptuInterface 5.6.2'.
Successfully installed 'ImpromptuInterface 5.6.2'.
Installing 'SpecFlow.Assist.Dynamic 1.0.2'.
Successfully installed 'SpecFlow.Assist.Dynamic 1.0.2'.
Adding 'ImpromptuInterface 5.6.2' to TableConversion.
Successfully added 'ImpromptuInterface 5.6.2' to TableConversion.
Adding 'SpecFlow.Assist.Dynamic 1.0.2' to TableConversion.
Successfully added 'SpecFlow.Assist.Dynamic 1.0.2' to TableConversion.

This has updated our App.config with the following:

<specFlow>
    <!-- For additional details on SpecFlow configuration options see http://go.specflow.org/doc-config -->
  <stepAssemblies>
      <!-- This attribute is required in order to use StepArgument Transformation as described here; 
    https://github.com/marcusoftnet/SpecFlow.Assist.Dynamic/wiki/Step-argument-transformations  -->
      <stepAssembly assembly="SpecFlow.Assist.Dynamic" />
    </stepAssemblies>
  </specFlow>

Create a .feature file with a table in it

Create the following .feature file:

Feature: TableConversion
	In order to avoid lots of code, I want my Tables in the feature file 
	to be automatically converted to an object I can use in the code of my 
	step definitions.

Scenario: TableConversionExample
	Given the following table:
	| id | sometext        | somebool |
	| 1  | Hello World     | True     |
	| 2  | and again hello | False    |
	Then my binding should have the following objects:
	| id | sometext           | somebool |
	| 1  | Hello World        | True     |
	| 2  | and again hello    | False    |

Create the following binding

using Microsoft.VisualStudio.TestTools.UnitTesting;
using System;
using System.Collections.Generic;
using TechTalk.SpecFlow;
using TechTalk.SpecFlow.Assist;

namespace TableConversion
{
    class MyPocoClass
    {
        public int    id       { get; set; }
        public string sometext { get; set; }
        public bool?  somebool { get; set; }
    }

    [Binding]
    public class TableConversionSteps
    {
        private Dictionary<int, MyPocoClass> MyObjects;

        public TableConversionSteps()
        {
            this.MyObjects = new Dictionary<int, MyPocoClass>();

        }

        [Given(@"the following table:")]
        public void GivenTheFollowingTable(Table table)
        {
            var rows = table.CreateSet<MyPocoClass>();
            //Store each row/object in a dictionary using its id as key
            foreach (MyPocoClass poco in rows)
            {
                this.MyObjects.Add(poco.id, poco);
            }
        }

        [Then(@"my binding should have the following objects:")]
        public void ThenMyBindingShouldHaveTheFollowingObjects(Table table)
        {
            var ExpectedObjects = table.CreateSet<MyPocoClass>();

            //Check that each object that should be present, really is present
            foreach (MyPocoClass ExpectedObject in ExpectedObjects)
            {
                MyPocoClass ActualObject = this.MyObjects[ExpectedObject.id];
                if(false == ActualObject.sometext.Equals(ExpectedObject.sometext))
                {
                    Assert.Fail(String.Format(
                        "Expected sometext '{0}', actual text was {1}",
                        ExpectedObject.sometext,
                        ActualObject.sometext));
                }
                
                if(ActualObject.somebool != ExpectedObject.somebool)
                {
                    Assert.Fail(String.Format(
                        "Expected somebool '{0}', actual somebool was {1}",
                        ExpectedObject.somebool,
                        ActualObject.somebool));
                }
            }
        }
    }
}

Run the unit test

When you run this test, you’ll see that it passes. Somethings to remember:

  • The framework maps the name of the fields in the table header to a property in your poco class. If it cant find that property, no errors will be raised

  • Conversion of text in the .feature file to a C# property strips/trims white-space before and after the text in the .feature file. White-space in the middle will remain and be included in your C# property

  • The framework uses the .Net methods to parse the fields. Be careful, the text “1” will not result in a True value in your boolean fields in the poco class

Setting the language for your .feature files

The syntax of the .feature files is meant to be readable by your users, so of course its logical that we should be able to create .feature files in many different languages.

How to set the language to use

Setting the language for all .feature files

If you want to set the language for all .feature files, then you can specify this in the App.config:

  <specFlow>
    ...
    <language feature="nl-NL" />
    ...
   </specflow>

Setting the language per .feature file

If you want set the language for a single .feature file then you can use a comment in the header of your feature file:

#language: nl-NL
Functionaliteit: Optellen van getallen
...

How to find the syntax for your language

Now that you’ve set your desired language, you can start creating .feature files using the keywords in your user’s language. How do we find out what these keyword are? Take a look at the Gherkin i18n file and you’ll be able to figure it out.

"lv": {
"name": "Latvian",
"native": "latviešu",
"feature": "Funkcionalitāte|Fīča",
"background": "Konteksts|Situācija",
"scenario": "Scenārijs",
"scenario_outline": "Scenārijs pēc parauga",
"examples": "Piemēri|Paraugs",
"given": "*|Kad",
"when": "*|Ja",
"then": "*|Tad",
"and": "*|Un",
"but": "*|Bet"
},
"nl": {
"name": "Dutch",
"native": "Nederlands",
"feature": "Functionaliteit",
"background": "Achtergrond",
"scenario": "Scenario",
"scenario_outline": "Abstract Scenario",
"examples": "Voorbeelden",
"given": "*|Gegeven|Stel",
"when": "*|Als",
"then": "*|Dan",
"and": "*|En",
"but": "*|Maar"
},

Basic integration of automated testcases with TestRail

TestRail's logo
In a previous post I talked about TestRail and using it for testcase management. In this post we dive into getting this up-and-running using a combination of SpecFlow and TestRail. SpecFlow is the tool that will run our testcases. TestRail is where we maintain lists of testsuites, testcases and testresults.

Setup a project on your TestRail account

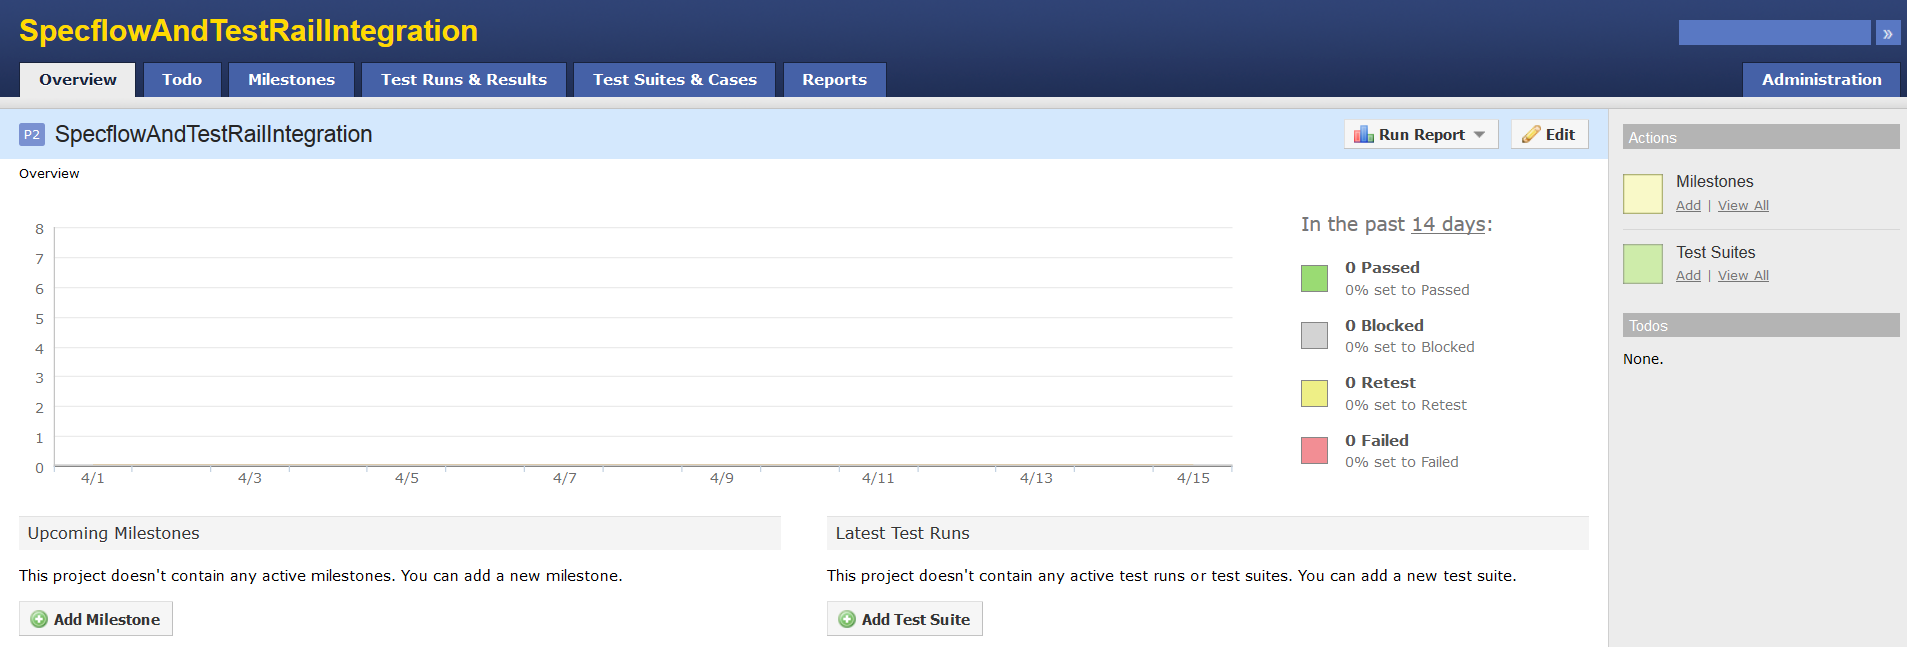
First we start by creating a new project in TestRail just for the purpose of this post:
The created project in TestRail

The created project in TestRail

Create a testsuite in TestRail

Within the project we define a testsuite that will contain our automated testcases. Depending on your specific situation you might want to have multiple suites.
Image showing creation of a new suite

Creating a new suite


Image showing the created suite

Testsuite created

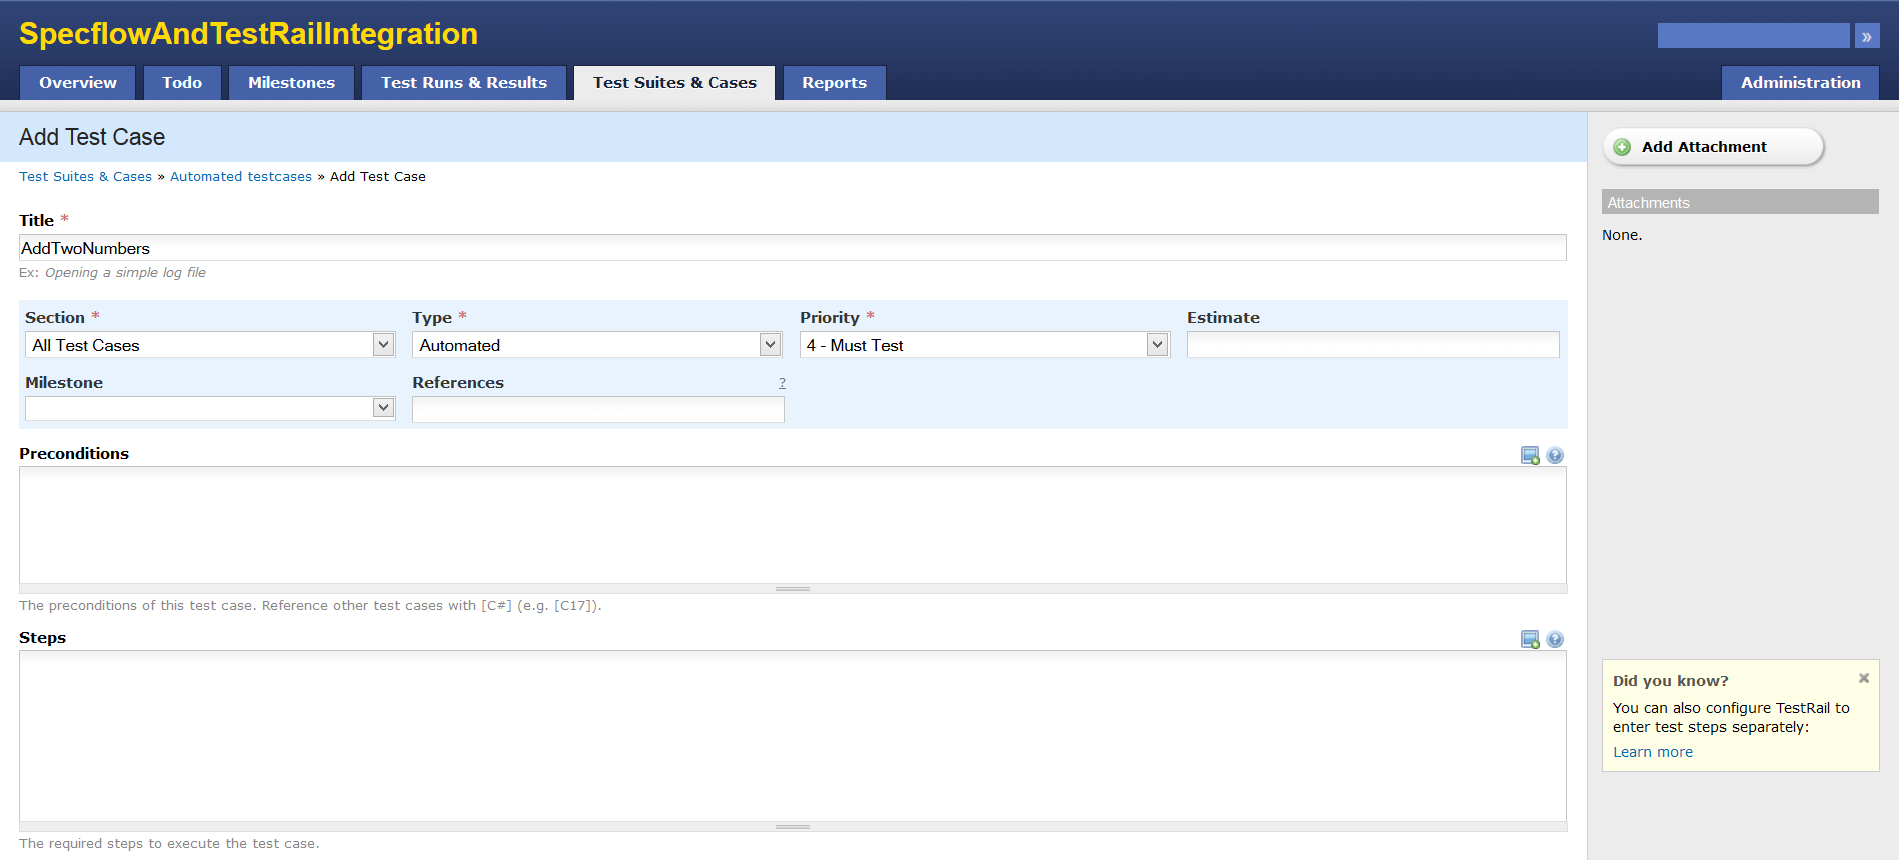
Create a testcase in TestRail

Now its time to create a testcases in TestRail that represents our automated testcase:
Creating a new testcase

Creating a new testcase


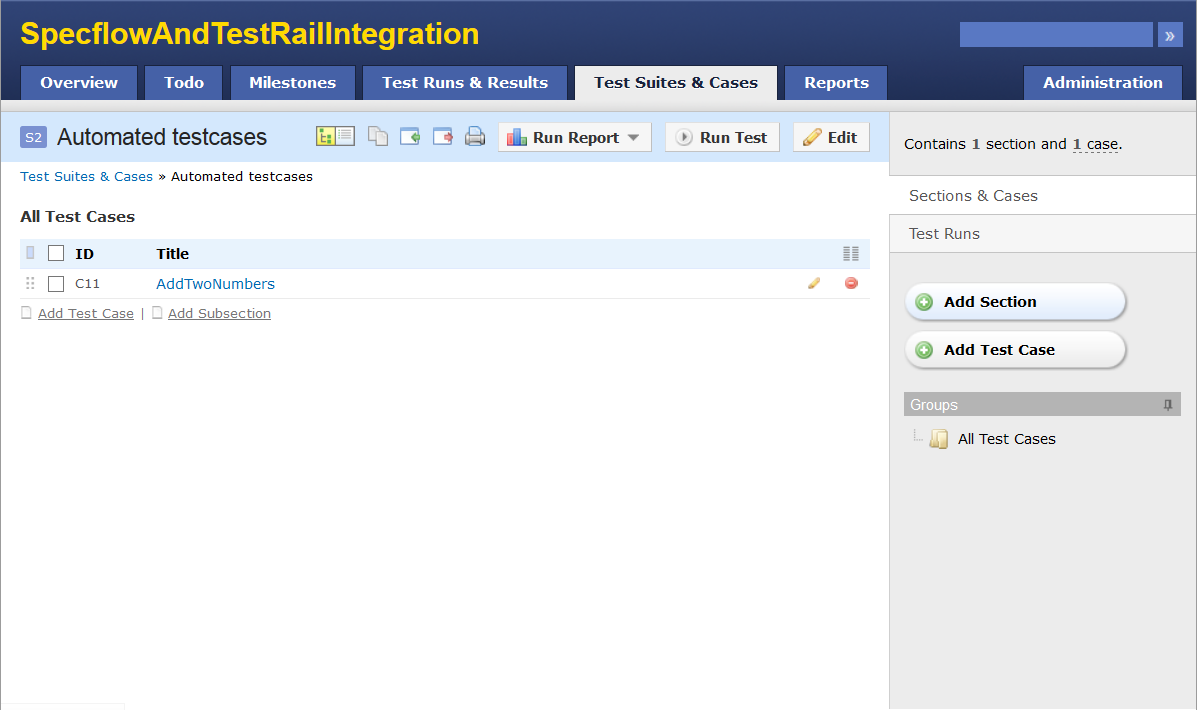
After saving this, we have 1 testsuite containing 1 testcase:
New testcase created

New testcase created

Create a test run in TestRail

A single testcase can be run multiple times and it might have a different result each time. Therefore, TestRail wants us to schedule the testcase in a testrun and we provide the testresult for the combination of the testcase within that testrun.
Testrun created

Testrun created, no results yet

In the above screenshot we see that we have created a testrun with id R1 and it includes a test with ID T1. Remember this ID as we will need it later when our automated test talks to your TestRail account.

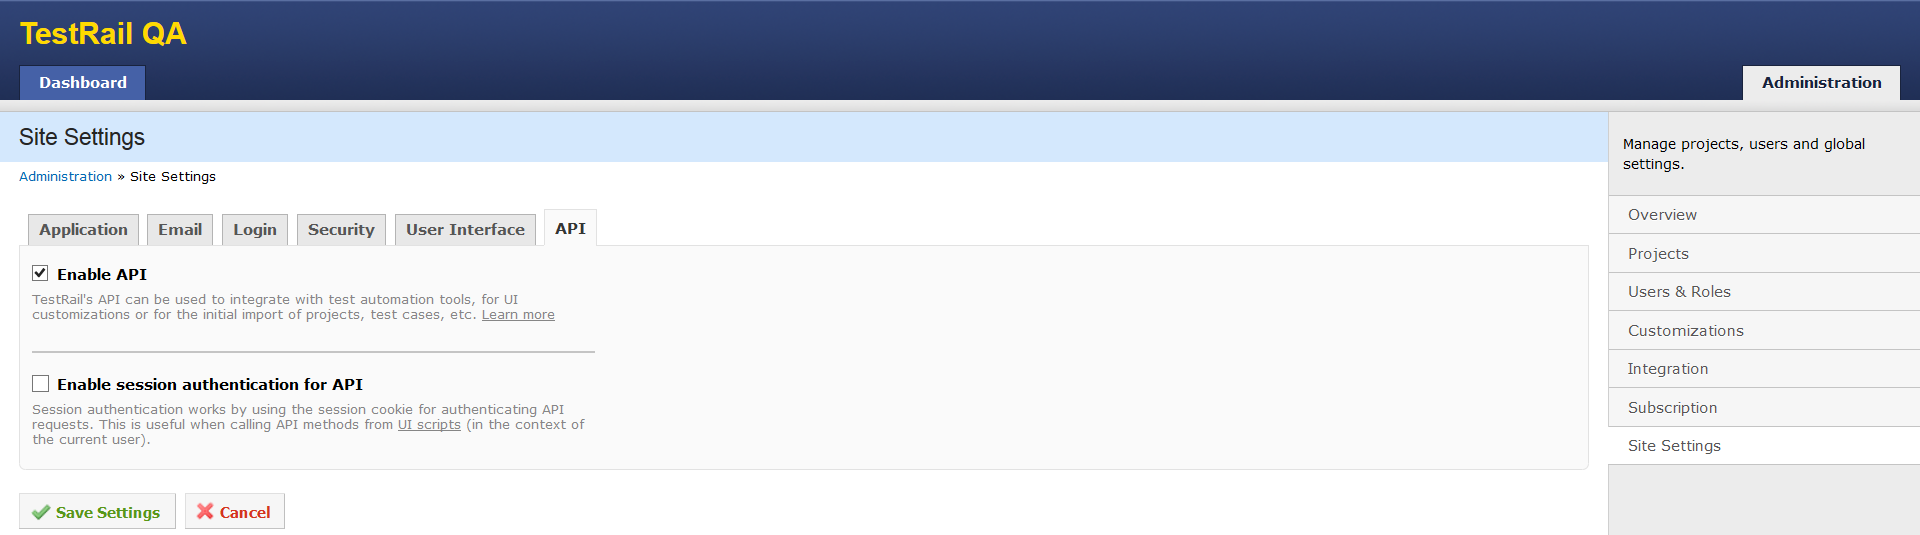
Setup TestRail to allow access to the API

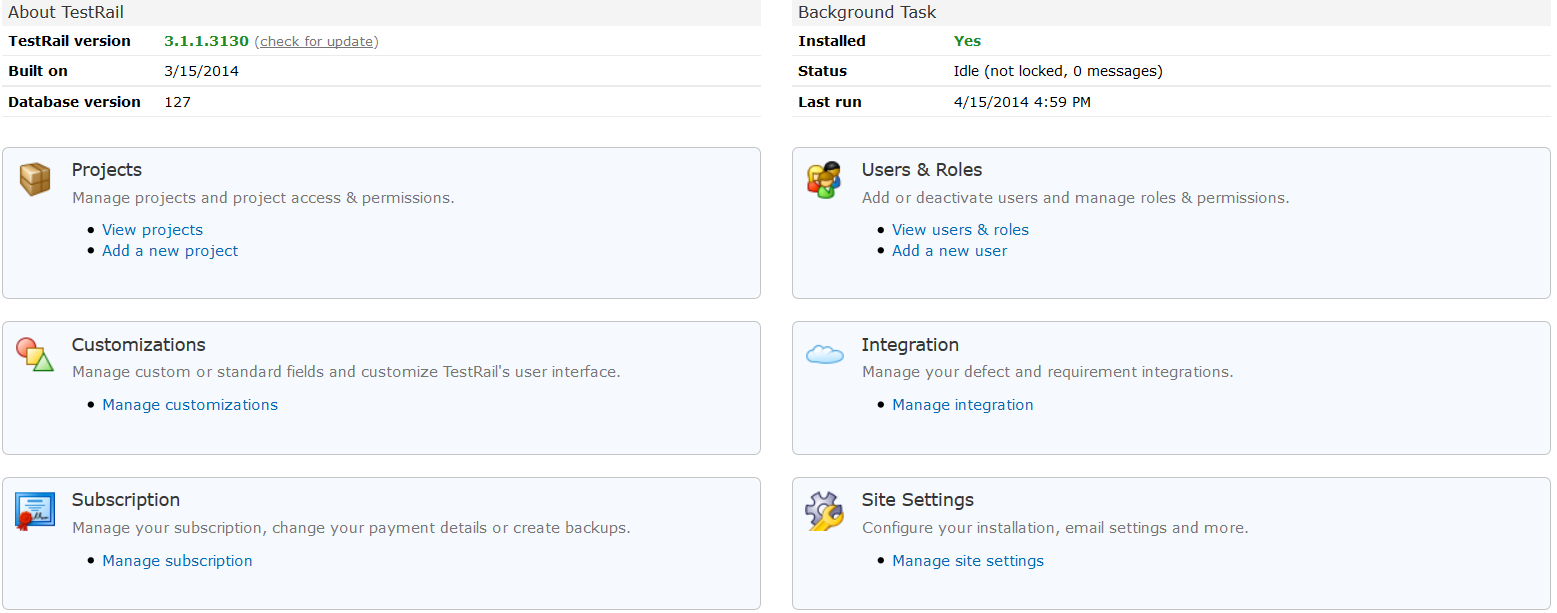
Before the API can be used, you need to enable it for your TestRail project. Go to your Dashboard and click on ‘Administration’
TestRail project administration page

TestRail project administration page

Click on ‘Manage site settings’, then on the ‘API’ tab and put a checkmark in the ‘Enable API’ checkbox:
API enabled for project

API enabled for project

Create a TestRail user to be used by the automated tests

Although not required, it is wise to have the automated testcases integrate with TestRail through a dedicated user. For this post I created a user with the following settings:

UsernameSpecFlow
E-mail adresAn email that you are able to access and that is not yet in use by another user
PasswordSpecFlow
LanguageEnglish
LocaleEnglish (United States)
TimezoneUTC+1

Download the TestRail API

TestRail provides a HTTP/JSON API that you can use to integrate your favorite testtool with your online TestRail projects. Its documented on http://docs.gurock.com/testrail-api2/start

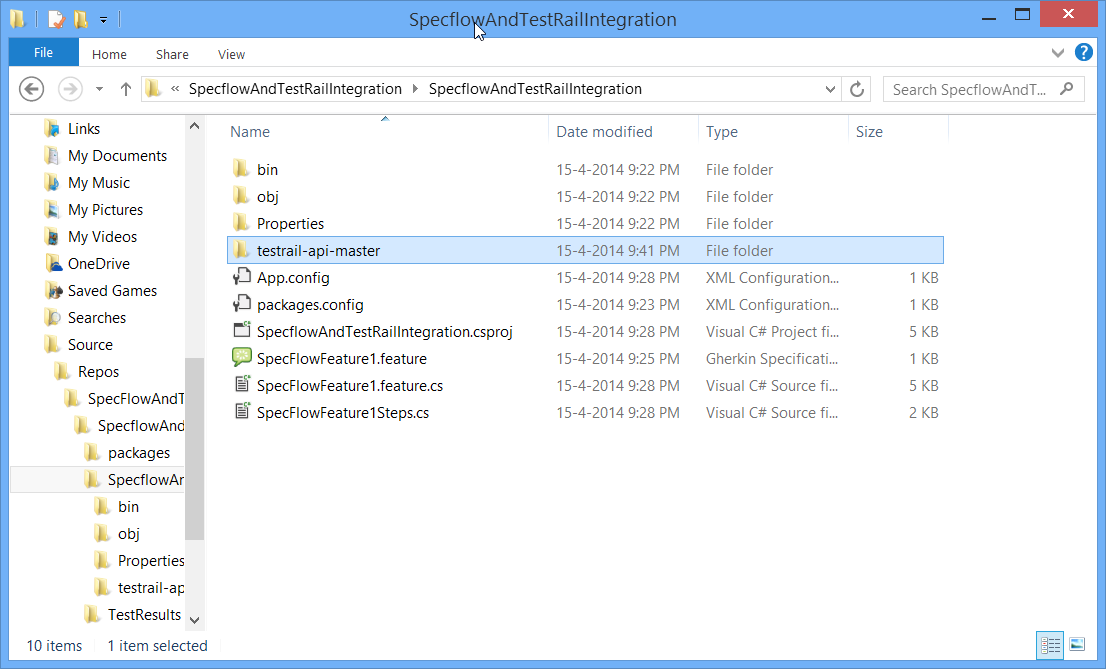
Download the API from the link in the TestRail documentation and extract the .zip into the directory where your solution is located.

Extracting API into your solution

Extracting API into your solution

Add the API to your solution

Insert the TestRail .csproj into your solution using File->Add->Existing Project:
Inserting Gurock.TestRail.csproj

Inserting Gurock.TestRail.csproj

Visual Studio might ask you which .Net framework to use. Change it to .Net 4.5

Visual Studio asking which .Net version to use

Visual Studio asking which .Net version to use

Build the Gurock project and add a reference in your testproject to the Gurock assembly.

Adding reference to Gurock.TestRail assembly

Adding reference to Gurock.TestRail assembly

Also add a reference to the Newtonsoft JSON library. We need this as the TestRail API returns JSON objects that we need to deal with in our C# code.

Adding reference to JSON.Net

Adding reference to JSON.Net


My installation of Visual Studio 2013 already had this library, if your installation doesn’t then the TestRail API docs provide a download link.

Create your automated testcase in SpecFlow

Our starting point will be the automated testcase we created earlier

Add the following using statements to your Binding:

using Gurock.TestRail;
using Newtonsoft.Json;
using Newtonsoft.Json.Linq;

Add the following method to the Binding. This code is executed by SpecFlow whenever a testcase has been run and it will push the result to TestRail. Because this is just a very basic introduction, I have hardcoded the ID of the test that we remembered from earlier.

        [AfterScenario]
        public static void AfterScenario()
        {
            Gurock.TestRail.APIClient client = new Gurock.TestRail.APIClient("https://yoursite.testrail.com/");
            client.User = "user@domain.com"; //Put the e-mail of your user here
            client.Password = "SpecFlow"; //Put the password of your user here

            Dictionary<string, object> testResult = new Dictionary<string, object>();
            if(null != ScenarioContext.Current.TestError)
            {
                
                testResult["status_id"] = "5"; //failed;
                testResult["comment"] = ScenarioContext.Current.TestError.ToString();
            }
            else
            {
                testResult["status_id"] = "1"; //passed
            }
            
            client.SendPost("add_result/1", testResult); //Here I am using a hardcoded test id. 
        }

Note: Although the TestRail docs use a http:// address, you must use a https:// address if your site is hosted on TestRails cloud service, otherwise the API will throw exceptions containing HTTP 401 error messages.

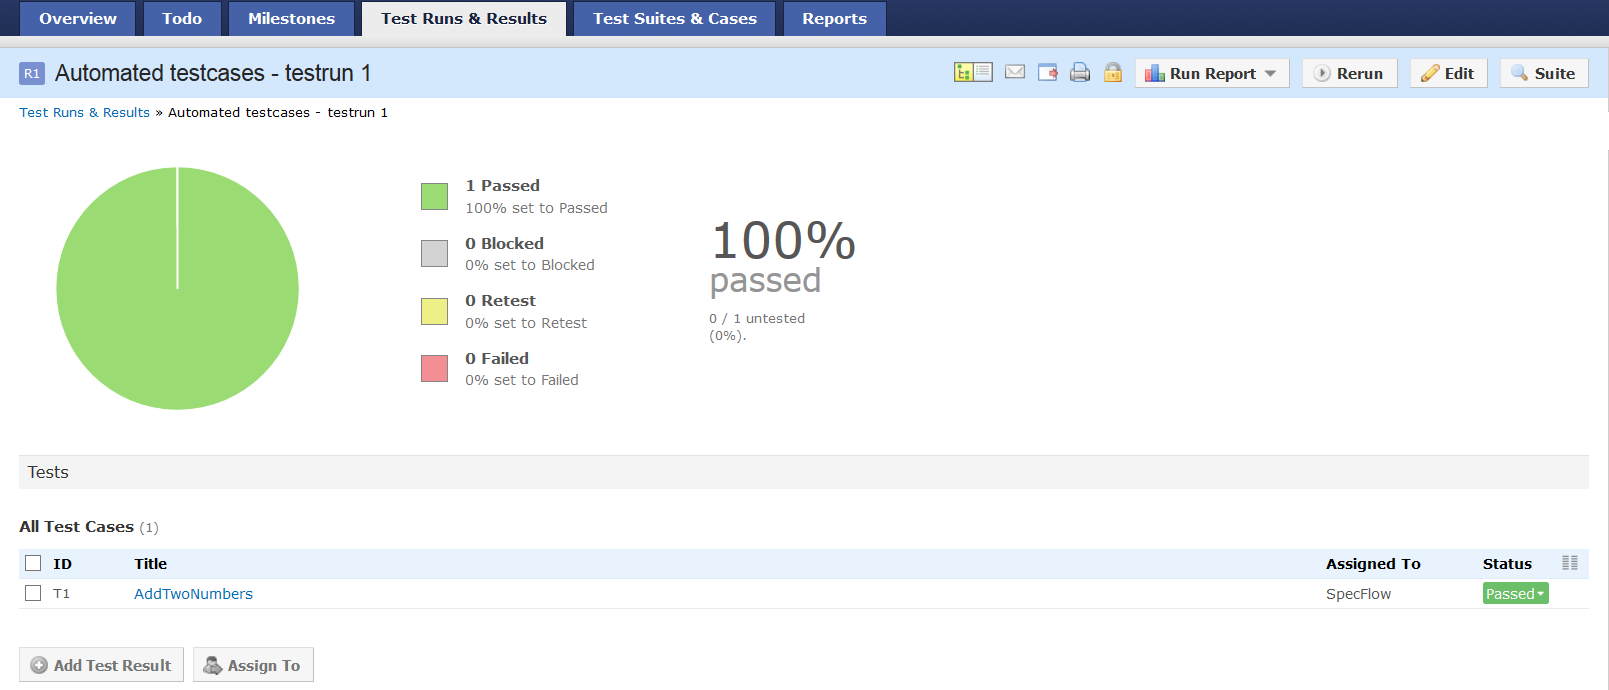
Run the test and check your TestRail site

Now run the SpecFlow testcase and you will see that TestRail now reports that the test has passed:
TestRail showing passed testcase

TestRail showing passed testcase